How do we do the audio mastering for Spotify LUFS specs? I’ve done some research to find out the latest specifications for mastering to Spotify and some other important digital streaming platforms.
How can you prepare your song masters for streaming platforms like Spotify, You Tube, Tidal and Apple Music? What LUFS to master to? I will try to answer some of those questions in this mastering article.
Measure and master your tracks with integrated -14 LUFS and keep the peak max -1.0 db at the loudest, and you are good to go for most digital distribution platforms!
I’ve collected some information that might be helpful and prepare you before mastering your track for release on digital streaming platforms.
New video on mastering for Spotify
You can watch this video about mastering a puzzle game music track in Bitwig Studio:
Mastering tips for Spotify
- Target the loudness level of your master at -14 dB integrated LUFS and keep it below -1 dB TP (True Peak) max. This is best for the lossy formats we use (Ogg/Vorbis and AAC) and will ensure no extra distortion is introduced in the transcoding process.
- If your master is louder than -14 dB integrated LUFS, make sure it stays below -2 dB TP (True Peak) max to avoid extra distortion. This is because louder tracks are more susceptible to extra distortion in the transcoding process.
How does Spotify calculate loudness
Spotify currently use ReplayGain, which was the most recognized standard for calculating loudness when Spotify first started.
In the future, Spotify plan to use a new standard for calculating loudness, called ITU 1770 (from the International Telecommunication Union). This defines the integrated LUFS (Loudness Units Full Scale) measure, and it’s what we recommend you use to measure the loudness of your tracks.
ReplayGain doesn’t specify a measurement unit for loudness, so we’re unable to give an exact measure in LUFS used by ITTU 1770. However, we adjust tracks to 3 dB higher than ReplayGain algorithm specifies, which is roughly equivalent to -14 dB LUFS, according to the ITU 1770 standard.
Read more about Spotify normalization here.
The final step before publishing a song on a streaming service
You just finished mixing your latest EP and everything just sounds great and you are ready to get those songs published to the world. But there is one crucial step before you can publish the EP… The mastering stage!
It is important to have great balanced audio with correct loudness before uploading your master to the streaming service.
The streaming services measure the loudness differently but -14 LUFS is a very good starting point. At least we need some kind of reference point to set our levels, or else we are left in the dark void of space.
Read more below if you want to learn more about the mastering process for digital streaming platforms.

Distribute your music to the Spotify streaming service without third party involvement.
Before we dig into the details of how you prepare you master for digital distribution there is a very relevant news to discuss regarding Spotif and how you get your music up and running on the service.
Spotify finally open the gates to indie artists!
September 20, 2018 Spotify revealed a new beta feature for Spotify Artists. The new feature makes it possible for indie musicians to upload and release their music with their service. Removing the need for the gatekeepers or middle-man, the labels eager to take a large bite of your hard earned cash.
The upload feature currently launched in beta state on Spotify for artists, the online dashboard that arrived last year. This dashboard allows artists to track their fan base demographics and metrics surrounding song streams.
The beta is available by invitation to a few hundred US-based independent artists, but will soon be available to more artists, labels and teams.
That means it will be easier than ever for indie artists to get their music on the renowned platform.
Great, finally!
Ok, let’s talk about the art of mastering!
Do you need to hire an expensive mastering studio to prepare your songs for the digital streaming platforms?
This really depends on how serious you are about your craft.
Remember that these tracks, when published, will probably live quite a few years on those streaming services. Yes, you can always go back and do a remix. Nonetheless it’s a good idea to make it sound right in the first place.
Scout and see if you have the budget to either master the tracks via any online service (yeah, you can leave the mastering to the AI of tomorrow). Or hire a mastering studio with proper monitoring setup to do the heavy lifting.
My advice though is that you do hire a mastering studio engineer.
It’s always good with another set of ears to scan the songs before they are officially released. The mastering studio monitor setup is probably a notch more expensive and has better room acoustics than your bedroom.
Boost Your Productions – Pristine Sound Packs


On the other hand you can always do it yourself. Get some mastering tools and learn the basics of the craft (there’s a YouTube video for that)! 😉
The days of demos (or promos) are kinda gone. Most music today when uploaded to the internet is considered – final product. Whether the artist knows it or not. Even if the artist calls the track “demo”…
There are many great freeware audio tools today to get your music master in a great state for digital distribution.
The days of demo is over!
If someone finds your unmastered song and listens to it, they will instantly compare it to all the other music they hear on the web and if your loudness and balancing is not in par with the other tracks out there, they might turn to some other track (there are quite a few songs out there to choose from).
Why is that?
Easy peasy, there are so many great tools to maximize the life out of music that people are very used to overly compressed and über limited audio. We had a loudness war going on for quite some years when even professional studios had to go with the flow and brick limit the music into square waves.
Yeah, I have to admit I was there too… Squashing my tracks into oblivion. (Lovely game by the way – Oblivion! 😉
Therefore it is quite important to have your track mastered to the LUFS standard of today. You want your tracks to sound dynamic and vibrant!
We are mastering for Spotify LUFS recommendation!
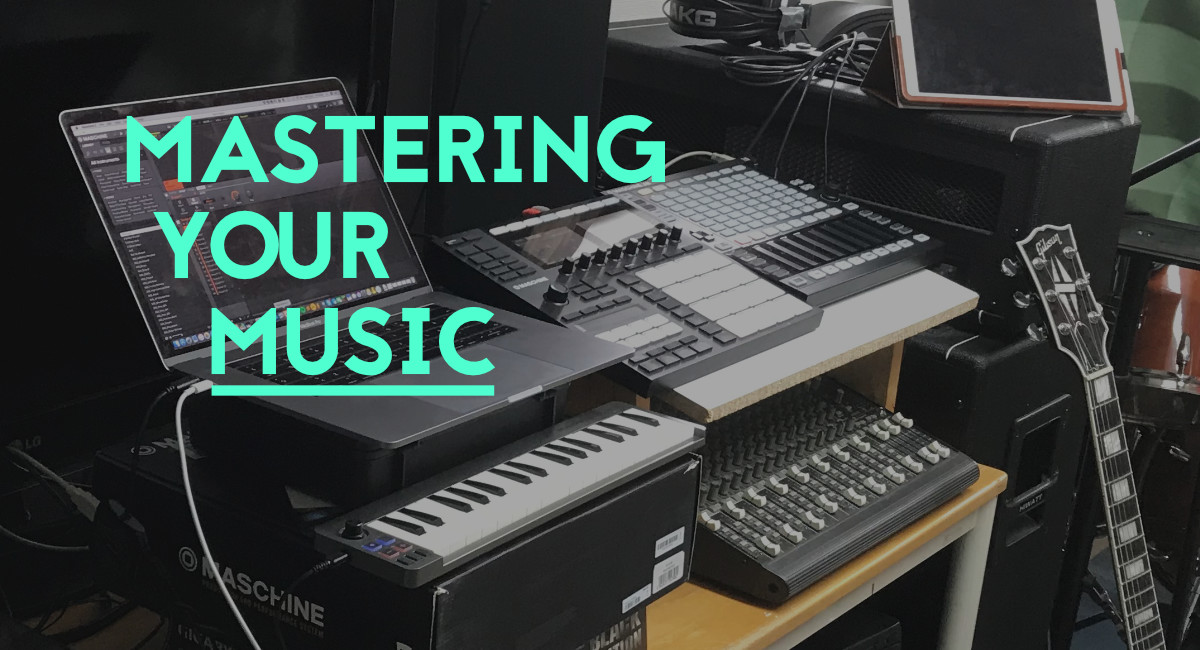
Mastering for Spotify LUFS
Let’s talk about the actual mastering process and the steps we should follow to reach a great result and a dynamic / vibrant musical outcome.
We want to make sure our audio master sound as good as possible on Spotify, You tube and the other services.
What is LUFS?
LUFS is the internationally recognised method of measuring loudness.
LUFS stands for ‘loudness units relative to full scale‘. Its the most accurate way to to measure loudness of audio. I think of it as a more precise RMS value. Importantly LUFS is more truthful to what we actually hear in terms of loudness, compared to RMS (root mean square) which will tell you the average power of the signal.
LUFS is more truthful to what we actually hear in terms of loudness.
You can find a superb free audio plugin for measuring LUFS in YouLean Loudness Meter 2. I just love this plugin, it has the most accurate LUFS meter I have seen. You can read more about YouLean in the article I wrote about my top 5 free vst plugins 2018.
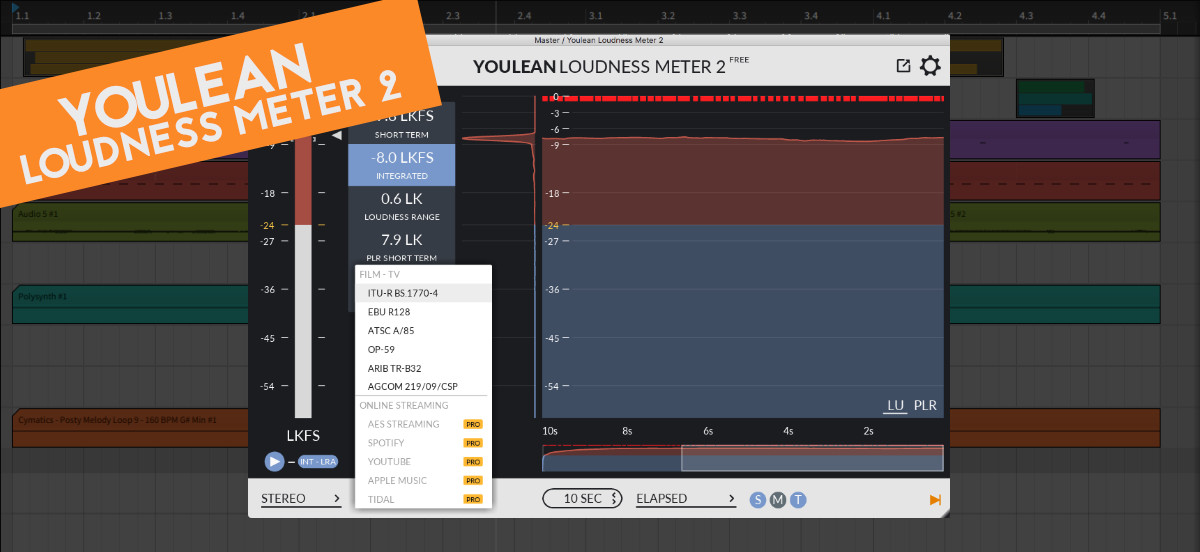
Just fire YouLean up and let it run for at least 10 seconds in a few places of your track (loud parts, and quiet into loud parts) and see what the integrated measurement loudness reads. Adjust your mastering (or mix) accordingly to keep the loudness in check with the reference integrated -14 LUFS.
Is there any good free mastering plugins?
Absolutely, there are many great audio plugins to get your mastering to a professional level. I wrote an article going through some great free plugins for mixing and mastering.
- Firstly you will need to add an EQ to filter out the absolute lows. This is usually around 30hz depending on what music you are mastering.
- Then you will need some stereo processing device to control the width of you mix in the separate frequency areas to make your lows solid mono and maybe add some spread to the high mids and highs.
- In the last step you will add the limiting device to gain stage your audio to the reference integrated loudness (which will probably be around -14 LUFS).
Gain staging is the final part of your mastering session
One particular good free compressor / limiting plugin that you will add as the final device in your mastering chain is the Limiter No6. It is a fully featured limiter vst plugin with 5 separate gain stage sections to make the mastering a breeze.
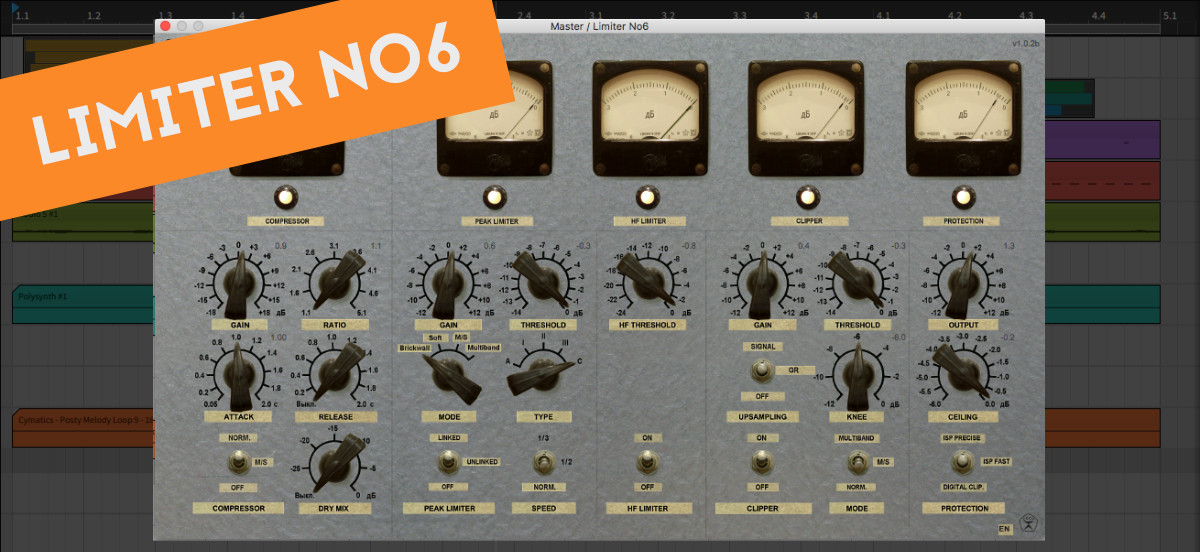
Go from left to right in the plugin and make your compression and peak limiting up to the levels and specifications you are targeting.
Always listen to reference music that you like and feel has a good balance in the bass, mid and highs. A/B listen and compare your own master while adjusting. It is easy to go blind and only use your eyes and not your ears with all the nice designs and knobs to turn.
Close your eyes from time to time and just listen. It will make all the difference, trust me!
I will publish a video soon with details on mastering with the Limiter No6 and some other great free plugins.
What Lufs to master to?
What is the reference loudness in LUFS that we should aim for?
If you aim for -14 LUFS you should be safe for the common streaming services like Spotify and YouTube.
Here is a chart for some streaming services.
| Streaming Service | Playback Level |
| YouTube | ~ 13 LUFS |
| Spotify | ~ 14 LUFS |
| Apple Music *Soundcheck On* | ~ 16 LUFS |
| Tidal | ~ 14 LUFS |
We are mastering for Spotify LUFS and the recommendation from the service is to target around -14 LUFS as integrated value.
I found some useful guidelines provided by Apple for measuring and preparing your masters for their platform. Check out the “Mastered for iTunes” guide here.
Spotify Normalization
According to the Spotify FAQ we can read:
When a user plays your album, we normalize the loudness level of that album at the same time. The entire album will play back at -14 dB LUFS from start to finish, and the gain compensation applied by Spotify won’t change between tracks. This means the softer tracks will be just as soft as you intend them to be.
Spotify FAQ
Mastering for Spotify LUFS Conclusion
In conclusion if you master your songs on a new album with different LUFS and peak volumes. Some tracks more silent than others. Your album will play back accordingly. The more silent tracks will be more silent, and those loud tracks will be louder. Spotify will only normalize, on playback, at a target -14db LUFS for the whole album.
Spotify will not magically increase the volume of your more silent tracks
So keep in mind that Spotify will not magically increase the volume of your more silent tracks. Make sure your mix is mastered properly to target the digital streaming platforms according to the chart above.
Final words
I hope you found this article useful, and please check our other articles on music production, sound design and graphics design.
If you have any further questions on mixing or mastering, feel free to contact us via the contact page.
Best Delay Plugin for vocals
I recently did a video and article on a really smooth BBD delay called Colour Copy from u-he. It’s really a wonderful delay plug-in that will give you a analogue sound. A perfect match for vocals, guitars and leads.
What gear I use in the studio? Check out the Resources Page.
Join my exclusive community: https://www.patreon.com/gelhein
Be sure to sign up to our newsletter for new exciting articles in design, music production and sound design.


 presets")