Could you produce better music if you had all the instruments in the world a click away? Would it ease up your workflow and make the magic happen more often? This article is about DAW template best practise. A DAW template can be a helpful tool to ease up your workflow. Furthermore, it can make the composition, mixing and production cycle of a song more streamlined.
Templates are not for everyone, there is no one-size-fits-all in music production. But if you plan your templates carefully they can really be a helpful starting point for your creativity.
In this article, we will discuss what a template is and how it can help your workflow.
You will also get 8 valuable tips on how to create a solid template.
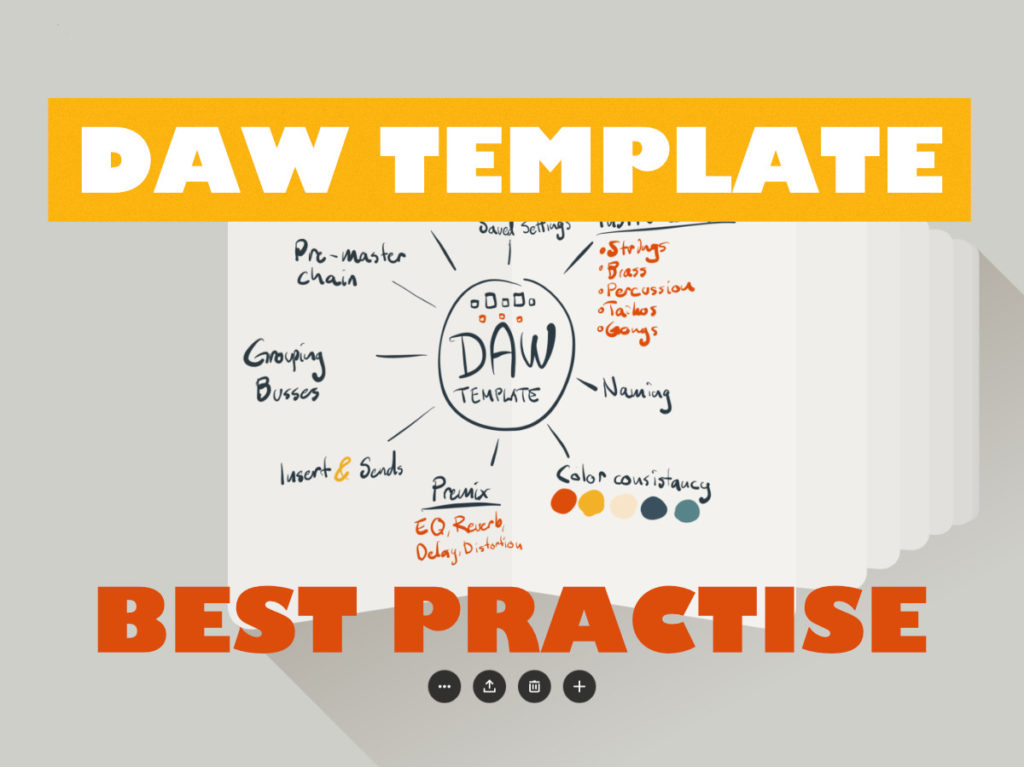
A predefined setup makes up your DAW template
Generally, a template is a predefined setup of your DAW to speed up workflow and remove repetitive tasks. Those tasks could be adding basic tracks, setting up reverb- and delay-sends. And it could be the preparation of an audio bus set up for side-chain compression.
You might have certain instruments that you always use, like pianos, guitars etc. Having those instruments and effects pre-loaded in a template can really help you narrow down the production cycle of a song or sound.
The template can be set to load as default in your DAW and let you start making music immediately. Removing the need to dive in multiple menus just to load up that perfect Steinberg piano.
Does it sound like a time-saver?

General and project-specific music production templates
I’d like to split templates into two camps, or categories if you will. First we have the general template and secondly, we have the project specific template.
General DAW template
The general template is a template with no specific production genre in mind. It can be a template where you might include all your instrument libraries in one big template. Including all those string, woodwind and brass libraries from every manufacturer you ever bought a product from.
Many instruments require tons of hardware power (yes, you need plenty of memory and disc speed to stream samples). To access that much raw power you can use a product like VEP (Vienna Ensemble Pro) and spread out the instruments on multiple computers. An alternative to VEP is called Bidule (developed by Plogue) which I played around with a few years back but never really stuck with.
I know some composers prefer to work with a big general template and they might have custom apps that handle instrument search and other time-consuming tasks.
A few years back I was into creating general templates and had multiple slave PC’s setup to host different libraries. For me it was a hazzle updating the template all the time and replacing some libraries with more recent and better sounding libraries. Not to mention when one computer went down! Nah, for me it’s definitely the good old saying; less is more.
Furthermore, I also found that the music I produced started to sound very static in instrumentation and sound when using big general templates.
All those “happy accidents” kind of went away (love you – Bob Ross) when I was going the general template path.
Computers have gotten faster removing the need for an external slave computer even with heavy projects, if you plan them wisely.
Where are all the happy accidents that breathe life into music?
Importantly, the music making process should be a living and breathing entity. Of course, there should be a direction. But there should be a sparkle of life in the process. All sounds should not sound exactly the same every time I begin a new project. A sample is always a sample even though we have 44 round-robin samples going wild. If you write a lot of cues you will start to notice that “dullness” and probably want to walk away and get some life back to your sounds.
Therefore I recommend producers to learn sound design. Research and dissect other patches / presets and learn to create your own unique sounds.
Not only will you get a unique sound of your own, but you will probably write music faster when you can create a sound that resides in your head. Rather than browsing thousands of presets and libraries. Not that presets are bad, they are a great starting point. And super for learning new plugins and sound design in general.
More about sound design tips in my previous article – How to create cinematic sounds in Bitwig Studio.
So for me, general templates was not the best workflow.
Boost Your Productions – Pristine Sound Packs


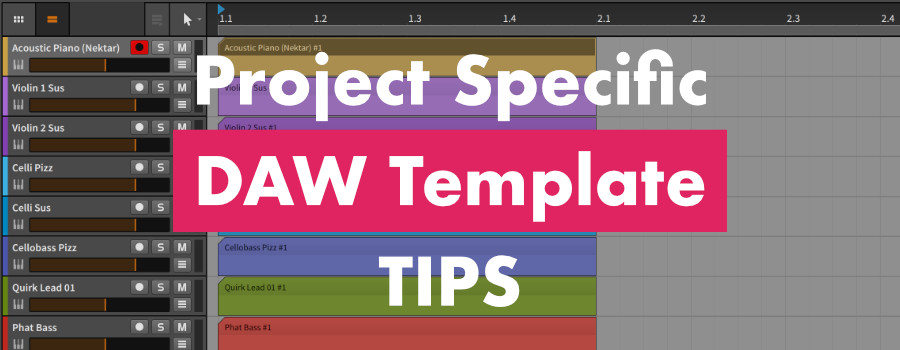
Project-specific DAW template
Therefore I started making smaller project specific templates instead. With “project specific template” I am not referring to a separate song template, but it can rather be a template for a whole series of songs for a specific game, film or media project. Maybe we are commissioned to write music for a wave racing game, like the game Aqua Moto Racing Utopia which I scored. Then we prepare a template for that whole game. Selecting instruments, percussion and effects that will be the starting point for that specific project. To get a clean, tight and cohesive production platform to work in for the game.
Frequent tight template creating, equals more Happy accidents!
If you go the project specific template route you will probably create new templates more often and thus we have a bigger chance of introducing new fresh sounds into our palette. We probably get more variation into our overall sound.
Below is a little PROS / CONS comparison table with some thoughts on the different template camps.
GENERAL TEMPLATE
PROS
- Access to all instruments
- Start any genre instantly
- Coherent sound
CONS
- Too much to choose from
- No happy accidents
- Generic sound, boring?
- Slow load time
PROJECT SPECIFIC TEMPLATE
PROS
- Slim instrumentation
- Tailored to specific project
- Quick load time
- Coherent sound
- Happy Accidents
CONS
- Have to create templates more often
- Forgot some instrument?
- Too specific for a bigger project?
Tips to create a good project specific DAW template
Here is a collection of tips to get started with your own project-specific DAW templates.
1. Add suitable instruments for the project
Select a batch of instruments that you feel fits the project brief. Make sure to use the same track numbers. It will make it easier to find the sounds you are looking for between projects. If you have 10 tracks of midi, maybe the first five are string instruments and the next five are brass instruments. If you re-use the same track number between projects and templates you will find instruments faster. Consistency is key to a good workflow.
2. Name tracks for quick and easy search
Don’t name your audio tracks with the default method like; audio 1 and audio 2. If you are going to have live guitar tracks, name them something like; “Gibson Gtr L”, “Gibson Gtr R” that also helps you to find what you are looking for more quickly.
You should be able to come back to a project in two weeks and understand what instrument or sound resides on those tracks.
3. Color consistently and with a plan
You want to be able to find the different instruments and sounds in your project quickly and without thinking. If you colour your tracks consistently it will really be a time-saver. Maybe the strings could be coloured in blue, brass in brown, woodwind in yellow and percussion in red. Re-use the same colour-scheme through your different projects and you will see that the colours make you work faster.
4. Pre-mix your tracks with EQ and effects for a great overall sound
Make a pre-production track with the game / film project in mind. During that production session you can go over some basic EQ and effects to make the instruments sit well together. Don’t go overboard with too much and drastic manipulation, but rather it could be small changes like get rid of the low end of instruments that does not need low frequency. You can also get rid of annoying resonating frequencies in strings and tame any peaks. This way you get a basic and clean basic mix starting point on all your productions using that template.
5. Add insert and send effects
Make sure your template has the basic reverbs and delays setup and make all your predefined channels have the send routing ready. Don’t add too powerful effects that will introduce track latency and delays or hog your CPU. Go for clean sounding effects that are easy on your CPU. Importantly, you don’t want that template to start at 75% CPU usage from the start. You will probably add effects and additional instruments later that might make the project a bit heavier.
6. Meaningful busses and grouping of tracks
Think about your general routing and track grouping via busses. Do you need a bus for all the synths so that you can control them with one fader? It’s probably a great idea to let all percussion go into one bus, all strings into one bus etc. If you have some basic busses pre-set your projects will probably be easier to mix, and for film
7. Create a pre-master chain
A DAW template should also have a basic pre-master chain which you can turn on / off while producing your tracks. My suggestion is that you add an EQ – Filter – Compressor / Multiband Compressor – Peak Limiter. To save your ears turn this plugin chain off while composing and activate it from time to time to listen to the track with some basic mastering effects. This is good if you need to send a quick mix to your client for evaluation. These days they expect the pre-mix to sound good and in par with a mastered track so it’s handy to have this chain ready to rock.
8. Save settings
Be sure to save instrument, plugin effect and channel specific settings, so that you can easily come back to a certain sound. This way you can access plugin specific settings between projects too.
9. Hardware / external gear routings (bonus)
If you have external synths, samplers or effects that you want to use with your DAW it is a vital part to get all routings ready. Make the routing once and save it in your template to speed up future sessions. If you think about it, in an analogue studio you have all gear hooked up once with cables. Those cables will probably stay hooked to that mixer even when the engineer goes home for the evening.
An example of a basic project specific template for an orchestral game could look like this:
- Piano – I usually have a piano patch on the top as a general composition writing patch.
- String ensemble patch – as with the piano, this is also for general writing.
- Violin legato – solo melody patch
- Cello legato – solo melody patch
- Violin 1
- Violin 2
- Viola
- Cello
- Cellobass
- Synth 01
- Synth 02
- Orchestral Percussion – timpani, snares, taikos, cymbals in one patch.
- Cymbal Swell / Crescendo – a cymbal or gong swell patch.
- Sub hits – really low boomers for epic tracks.
- Sound effects 01
- Sound effects 02
Conclusion
Wether you create a general- or project-specific-template I am sure a template of any kind will help your audio production workflow.
I hope this tutorial can give a spark of ideas to get you started setting up your own templates for various projects. This is my personal workflow, something else might work for you. But I hope you can take away some ideas from this DAW template best practise article.

What gear I use in the studio? Check out the Resources Page.
Join my exclusive community: https://www.patreon.com/gelhein
Be sure to sign up to our newsletter for new exciting articles in design, music production and sound design.


 presets")